
A Step-by-Step Guide: How to Terminate Cat6 Keystone Jack
Published:Executive Summary: A bad Cat6 keystone jack termination is the single most common cause of network certification failures -- not defective cable, not inadequate switch ports, but a punch-down block where one conductor sits a millimeter short of full depth. This guide covers every step of Cat6 keystone jack termination: the tools worth paying for, T568A vs T568B wiring decisions, cable preparation with correct untwist limits, punch-down technique, and systematic testing. Whether you are a structured cabling technician terminating 200 jacks on a commercial fit-out or an IT manager doing a handful of in-house office drops, the same rules govern whether your links pass TIA-568-C.2 certification or generate callbacks.
For large-scale deployments where termination consistency directly impacts the channel vs permanent link test margin, the difference between a good and bad termination is often the entire headroom budget for your speed tier.
Quick Navigation
- 1 Why Keystone Jack Termination Matters
- 2 Tools and Materials You Need
- 3 T568A vs T568B: Which Wiring Standard
- 4 Cable Preparation: Strip, Untwist, Organize
- 5 Step-by-Step Termination Process
- 6 Testing and Certification
- 7 Common Mistakes That Fail Certification
- 8 Keystone Jack vs RJ45 Plug: When to Use Each
- 9 Key Questions Answered

Proper keystone jack termination requires the right tools, correct technique, and systematic verification -- not just a pair of scissors and hope
Why Keystone Jack Termination Matters
In structured cabling, every in-wall horizontal run ends at a keystone jack. Unlike factory-terminated patch cables where the manufacturer controls every variable, field-terminated keystone jacks introduce human variability -- and that variability is the dominant source of test failures in certified installations.
Consider what a Cat6 termination must achieve electrically. At 250 MHz, the wavelength of a signal on twisted-pair copper is roughly 0.8 meters. A 10 mm section of untwisted conductor at the IDC block represents approximately 1.25% of a full wavelength -- enough to create a measurable impedance discontinuity. When that discontinuity interacts with adjacent pairs, you get additional crosstalk coupling that erodes the performance margin the cable manufacturer engineered into the product.
Termination Quality: The Real Numbers
Field data from cable certifier manufacturers shows that over 70% of Cat6 certification failures trace back to termination errors, not cable defects. The most common root causes:
- Excessive untwist at termination point (~40%): Degrades NEXT (Near-End Crosstalk) margin by 2-6 dB
- Incomplete punch-down seating (~25%): Creates intermittent opens under thermal cycling
- Nicked conductors from over-aggressive stripping (~15%): Introduces reflection points and eventual fracture
- Split pairs from misread color codes (~12%): Complete link failure that continuity testers miss
- Category mismatch -- jack and cable different ratings (~8%): Bottlenecks entire channel to lower spec
For PoE deployments up to PoE++ (Type 4, 90W), termination quality matters doubly. Higher DC current flow through poorly seated IDC contacts generates localized heating that accelerates oxidation, increases contact resistance, and creates the classic "works at 15W, fails at 60W" intermittent fault pattern that plagues security camera and wireless AP installations.
Tools and Materials You Need
2.1 Essential Tools
| Tool | What to Look For | Why It Matters | Budget Option | Pro Pick |
|---|---|---|---|---|
| Punch-Down Tool (110 Blade) | Adjustable HI/LO impact, replaceable 110 blade with cutting edge | Inconsistent impact force = inconsistent IDC seating. Cutting edge must face outward to trim excess cleanly. | Cable Matters 110 (~$15) | Klein Tools VDV427-300 (~$45) |
| Cable Stripper | Adjustable blade depth, rotary or linear action | Must remove jacket without nicking conductor insulation. A nicked conductor is a latent failure. | Adjustable rotary stripper (~$12) | Klein Tools VDV110-061 (~$25) |
| Flush Cutters | Sharp, flush-cutting jaw geometry | For trimming spline, rip cord, and cleaning up excess after punch-down | Hakko CHP-170 (~$8) | Knipex 78 03 125 (~$35) |
| Cable Tester | Wire map + length (minimum); certifier for paid work | Wire map test catches opens, shorts, and miswires. Does NOT catch split pairs or marginal NEXT. | Klein VDV526-200 (~$45) | Fluke DSX-8000 (certifier) |
2.2 Materials
| Material | Specification | Notes |
|---|---|---|
| Cat6 Keystone Jack | 110-style IDC, T568A/B color-coded, rated for 23-24 AWG solid copper | Must match cable category. Cat5e jack in Cat6 channel limits performance to Cat5e. Look for 50 micro-inch gold plating on RJ45 contacts for PoE durability. |
| Cat6 Solid-Core UTP Cable | 23 AWG solid bare copper, 250 MHz rated | Solid conductor for permanent links. Never use stranded cable with IDC termination -- it cold-flows under the IDC blade and loses contact pressure over time. |
| Wall Plate / Patch Panel | Standard keystone cutout, unloaded or loaded | Confirm keystone form factor fits the plate/panel. Some keystones have slightly different latch dimensions. |
| Velcro Cable Ties | Hook-and-loop, 12mm width | For strain relief and cable management. Never use zip ties on data cable -- they compress the jacket and change impedance. |
Optional but Worthwhile Upgrades
One-handed termination tool (eg. VCELINK C265-6A): Punches all 8 conductors simultaneously. Cuts termination time by 60-70% on volume jobs. Consistent pressure across all IDC contacts. Only compatible with specific keystone jack models -- verify before purchasing.
Label printer (eg. Brady BMP21-PLUS): Self-laminating wire markers that survive in ceiling spaces and IDF closets. Handwritten labels fade and peel within 2-3 years.
Visual fault locator (VFL) for fiber runs: If your site mixes copper and fiber, a VFL saves hours tracing unlabeled fiber patch cords.
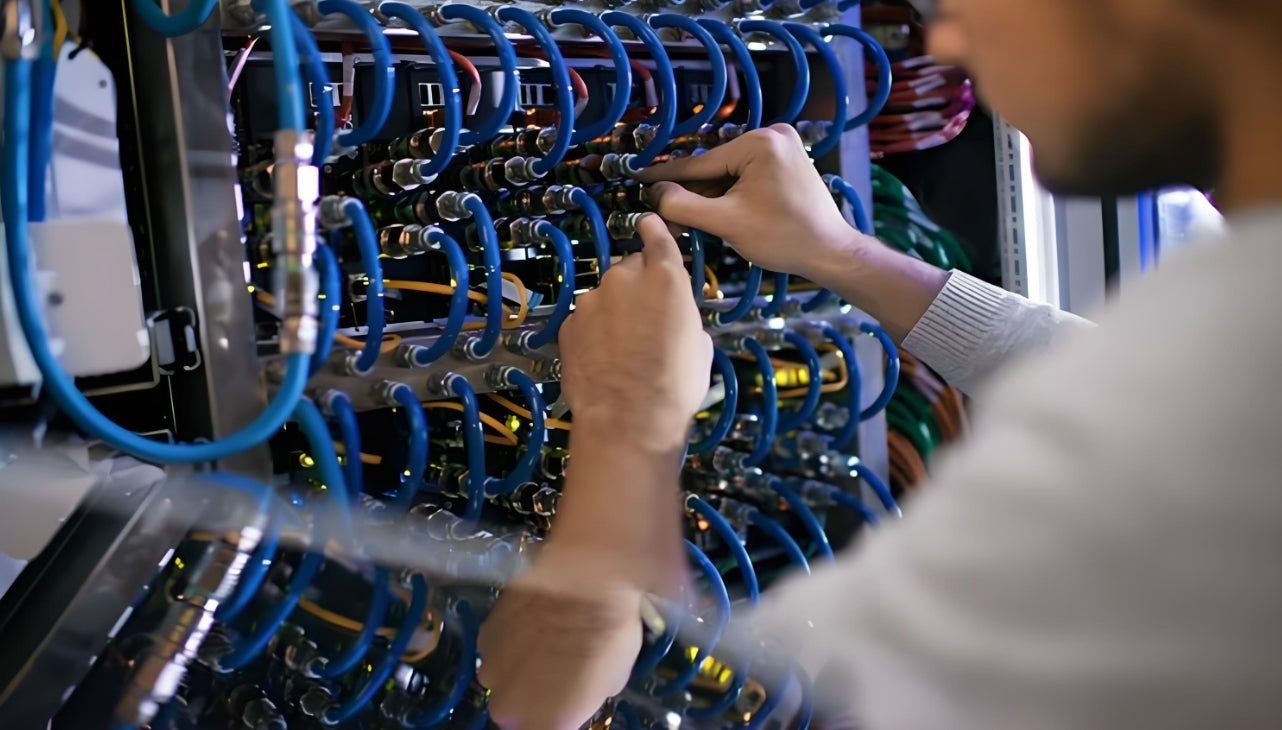
A well-organized termination workstation with quality tools reduces error rates by 30-50% on high-volume installs
T568A vs T568B: Which Wiring Standard to Use
3.1 The Pinout Difference
T568A and T568B are two wiring schemes defined by ANSI/TIA-568. They differ solely in the assignment of the orange and green pairs to pins 1-2 and 3-6. Electrically, they are identical -- same insertion loss, same NEXT performance, same bandwidth. The difference is convention.
| Pin | T568A | T568B |
|---|---|---|
| 1 | White/Green | White/Orange |
| 2 | Green | Orange |
| 3 | White/Orange | White/Green |
| 4 | Blue | Blue |
| 5 | White/Blue | White/Blue |
| 6 | Orange | Green |
| 7 | White/Brown | White/Brown |
| 8 | Brown | Brown |
Note: Pins 4-5 (blue pair) and pins 7-8 (brown pair) are identical in both schemes. Only the green and orange pairs swap positions.
3.2 Which One Should You Use?
Decision Rule: Single Standard, Entire Site
For North American commercial installations: Use T568B. Over 90% of commercial structured cabling in the US and Canada uses T568B. Government contracts under federal procurement rules typically default to T568B unless T568A is explicitly specified.
For residential or mixed-use projects: Check what the existing plant uses. If the facility already has terminated drops, match the existing standard. Consistency across the site matters more than which standard you pick.
Critical rule: Both ends of every run must use the same standard. Mixing T568A on the keystone jack and T568B at the patch panel creates a crossover -- the link will test as a wire-map failure even though individual connectors look correct. This is the single most common mistake technicians discover during certification.
European note: Many EU commercial sites default to T568A. Always verify with the project specification sheet before terminating your first jack.
3.3 Reading the Color-Code on the Keystone
Every quality Cat6 keystone jack prints the color sequence directly on the IDC housing. You will see two rows of color labels: one for "A" (T568A) and one for "B" (T568B). Pick one row and follow it for all eight conductors. Do not mix and match -- if you read the B row for green and the A row for blue, you produce a split pair that a basic wire-map tester will not detect but that will fail certification at 250 MHz.
Cable Preparation: Strip, Untwist, Organize
Cable preparation is where most termination problems originate. The goal is to expose enough conductor to reach the IDC slots while maintaining pair twist geometry as close to the termination point as possible.
4.1 Strip the Outer Jacket
- Strip length: Remove approximately 40-50 mm (1.5-2 inches) of outer jacket. More than 75 mm (3 inches) unnecessarily increases untwist length; less than 30 mm (1.2 inches) makes it difficult to seat conductors without excessive bending.
- Technique: Use an adjustable cable stripper set to the jacket thickness. Score the jacket in one or two rotations. Bend the cable at the score line to snap the jacket, then slide it off. If you feel resistance or hear a scraping sound, the blade depth is set too high -- back it off and re-strip a fresh section.
- Inspection: Immediately after stripping, examine all eight conductors under good light. Look for any shiny spots, flattened areas, or visible copper where the stripper blade may have nicked the insulation. A nicked conductor is a future failure. Cut back 50 mm (2 inches) and re-strip if you see any damage.
4.2 Remove the Spline and Rip Cord
Cat6 cable contains a plastic cross-spline (also called a separator or isolator) that physically separates the four twisted pairs. This spline improves NEXT performance within the cable but must be removed at the termination point:
- Grip the spline with needle-nose pliers or flush cutters near the jacket cut line.
- Cut it cleanly as close to the jacket as possible -- do not pull or yank, as this can disturb the pair lay.
- Also cut the rip cord (the nylon string under the jacket) at the jacket edge.
4.3 Separate and Order the Pairs
This step requires the most discipline:
- Separate the four pairs by color: orange pair, green pair, blue pair, brown pair.
- Untwist each pair only as much as needed to reach its designated IDC slot. The TIA-568 standard specifies a maximum of 13 mm (0.5 inch) of untwisted conductor at the termination point. For Cat6 at 250 MHz, keep it under 10 mm (0.4 inch) if possible -- every millimeter of untwist incrementally degrades NEXT headroom.
- Order the conductors according to your chosen standard (T568A or T568B). Most technicians fan the pairs out in a flat ribbon arrangement before inserting them into the IDC slots. The order for T568B is: White/Orange, Orange, White/Green, Blue, White/Blue, Green, White/Brown, Brown.
Why Untwist Limits Matter (The Physics)
Each twisted pair is a balanced transmission line. The twist rate -- different for each pair to minimize coupling between pairs -- creates a specific characteristic impedance of 100 ohms. When you untwist a section, you create a short parallel-wire transmission line segment with different impedance, different coupling characteristics, and different propagation velocity. At 250 MHz (Cat6) and 500 MHz (Cat6A), even 13 mm of untwist produces a measurable impedance discontinuity that reflects energy back toward the source and couples into adjacent pairs. This is why the TIA standard sets a hard untwist limit.
Bottom line: Maintain pair twist to within one twist pitch of the IDC contact. If the jack has a pair manager or rear cap that snaps closed before punch-down, use it -- it holds the twist geometry in place while you work.

Fanning pairs into the correct sequence with minimal untwist -- the most technically demanding step in the entire termination workflow
Step-by-Step Termination Process
Step 1: Seat Conductors into IDC Slots
With the keystone jack in front of you and the color label facing up, lay each conductor into its matching color-coded slot. The conductor should sit in the slot's guide channel -- you should see the insulation fully inside the channel walls, with the conductor extending slightly past the IDC contact blade area.
- Work from one side to the other (typically starting with the brown pair and finishing with the orange/white-orange, or vice versa depending on jack orientation).
- If the jack has a hold-down cap (also called a wire cap or pair manager), close it onto the seated conductors before punch-down. This cap maintains alignment and prevents conductors from popping out during the punch-down stroke.
- Verify that each conductor is in the correct color slot -- match color to label, not memory. A single swapped conductor creates a wire-map failure.
Step 2: Punch Down Each Conductor
This is the critical step where the IDC (Insulation Displacement Contact) blade cuts through the conductor insulation and cold-welds to the copper:
- Set your punch-down tool to the correct impact setting. For 23-24 AWG solid copper Cat6 cable, use the HI (high) impact setting. LO (low) is for 26 AWG or smaller conductors. Using LO on 23 AWG often results in incomplete IDC penetration.
- Position the tool squarely over the conductor in its IDC slot. The cutting edge of the 110 blade must face outward -- toward the excess wire tail that extends past the jack body. If the cutting edge faces inward, you will cut the conductor on the wrong side and create an open circuit.
- Hold the tool perpendicular (90 degrees) to the jack surface. Angled punch-down strokes cause uneven IDC penetration -- one side of the blade cuts deeper than the other.
- Press down firmly and squarely with one decisive stroke. You should hear a distinct "click" or "snap" as the tool's spring mechanism fires. This sound confirms that the IDC blade has fully penetrated the insulation and seated the conductor at the bottom of the slot.
- Repeat for all eight conductors. Work methodically -- many techs work left-to-right or right-to-left to avoid skipping a conductor.
Punch-Down Tool Technique Checklist
- 110 blade installed with cutting edge facing outward
- HI impact setting for 23-24 AWG solid copper
- Tool held 90 degrees to jack surface -- not angled
- Single decisive stroke -- do not pump or double-punch (double-punching can micro-fracture the IDC blade)
- Audible click/snap confirms proper seating
- Excess conductor tail is trimmed cleanly by the cutting blade
- If using a one-handed termination tool, verify all 8 conductors are fully seated after the single actuation
Step 3: Verify and Inspect
After punching down all eight conductors, conduct a visual inspection before closing the jack:
- Check IDC depth: Each conductor should be at the bottom of its slot. If you can see the conductor sitting halfway up the slot, the punch-down stroke was incomplete -- re-punch that conductor with a clean stroke.
- Check trim quality: Excess conductor tails should be cut cleanly at the outer edge of the IDC block. Hanging tails or ragged cuts indicate a dull punch-down blade -- replace the blade before continuing.
- Check color order: Run your eyes across all eight slots one more time. Confirming color-to-label match at this stage costs 5 seconds; fixing a miswired jack after the wall plate is mounted costs 5 minutes.
- Check strain relief: The outer cable jacket should be seated inside the keystone jack's strain relief clip or clamp. When the cable is pulled, the force should transfer to the jacket and strain relief, not to the individual IDC connections.
Step 4: Close and Install
- Snap the dust cover or rear cap onto the keystone jack body. The cover should click into place without resistance from stray conductor tails.
- Snap the completed keystone jack into its wall plate, surface-mount box, or patch panel. The orientation tab on the jack should align with the corresponding notch in the mounting frame.
- Dress the cable neatly in the wall box or cable manager. Leave a small service loop (10-15 cm or 4-6 inches) inside the wall box to allow future re-termination without pulling new cable.
- Apply a label to the wall plate or patch panel port following your site's labeling standard.
A properly terminated and installed keystone jack -- clean, labeled, and ready for acceptance testing
Testing and Certification
6.1 Three Levels of Testing
| Test Level | What It Checks | What It Misses | Tool Required | When to Use |
|---|---|---|---|---|
| Wire Map | Pin-to-pin continuity, opens, shorts, crossed pairs, reversed pairs | Split pairs, NEXT, return loss, insertion loss, length over-limit | Basic cable tester ($30-60) | Every termination, immediately after completion |
| Qualification | Wire map + length + basic signal-to-noise measurement | Full frequency-domain parameters required for Cat6 certification | Qualifier ($200-800) | Troubleshooting, verifying existing cabling |
| Certification | All TIA-568-C.2 parameters: wire map, length, insertion loss, NEXT, PS NEXT, ACR-F, PS ACR-F, return loss, propagation delay, delay skew, DC resistance | Nothing -- complete channel or permanent link verification | Certifier (Fluke DSX, $5K+) | New installations requiring warranty, commercial contracts, 10GbE readiness |
6.2 Wire Map Test: Minimum Pass/Fail for Every Run
A wire map test is the absolute minimum for any terminated keystone jack. Connect one test unit to the keystone jack (using a known-good patch cord) and the remote unit to the far end of the cable run (patch panel or another keystone). The test verifies:
- All 8 pins map 1:1 from end to end
- No opens (broken or disconnected conductor)
- No shorts (conductors touching each other)
- No crossed pairs (eg. pin 1-2 swapped with pin 3-6)
- No reversed pairs (eg. pin 1 maps to pin 2 and vice versa)
Important limitation: A wire map test will pass a split pair (where both conductors of a pair are terminated to pins belonging to different pairs -- e.g., the white/orange wire on pin 3 and the white/green on pin 1). A split pair passes wire map (continuity is correct) but fails certification catastrophically because the two conductors that should be a tightly coupled balanced pair are now on different physical pairs with different twist rates. This is why certification testers are essential for commercial work.
6.3 Certification Testing: What to Expect
Cat6 Permanent Link Certification Parameters (TIA-568-C.2)
| Parameter | Limit (Cat6 @ 250 MHz) | What It Reveals |
|---|---|---|
| Insertion Loss | ≤ 35.9 dB (90m permanent link) | Cable length, conductor quality, nicked conductors |
| NEXT (Near-End Crosstalk) | ≥ 33.1 dB | Untwist length, pair separation at IDC, cable deformation |
| PS NEXT (Power Sum NEXT) | ≥ 30.2 dB | Combined crosstalk from all pairs into tested pair |
| Return Loss | ≥ 10.0 dB | Impedance discontinuities -- kinks, crushed jackets, bad connectors |
| ACR-F (ELFEXT) | ≥ 9.3 dB | Far-end crosstalk; reveals problems at far end termination |
| Propagation Delay | ≤ 498 ns | Total cable length verification |
| Delay Skew | ≤ 44 ns | Pair-to-pair length mismatch; tight kinks change pair length |
When a link fails certification, the tester identifies the failing parameter and frequency. If the failure occurs at all frequencies: suspect a split pair or an open/short missed by the wire map test. If the failure is marginal at high frequencies (200-250 MHz): suspect excessive untwist at the IDC, a tight cable bend near the termination, or a damaged conductor from stripping. Re-terminate both ends and retest -- 90% of marginal high-frequency failures resolve with a fresh termination.
Common Mistakes That Fail Certification
Mistake 1: Excessive Untwist at the IDC
The problem: Technicians untwist pairs back 25-50 mm (1-2 inches) because it makes the conductors easier to handle and insert. This fundamentally changes the transmission line characteristics near the connector.
The symptom: NEXT (near-end crosstalk) margin degrades, particularly for pairs 3-6 and 4-5 at frequencies above 150 MHz. A run that would pass with 2 dB of headroom now fails with -1.5 dB.
The fix: Maintain pair twist to within 10 mm (0.4 inch) of the IDC contact. Use the jack's pair manager or rear cap if it has one. If the conductors are too short to reach their slots without untwisting more, you stripped too little jacket -- re-strip with 10-15 mm more jacket removed.
Mistake 2: Wrong Wiring Standard on One End
The problem: One end of the run is terminated T568B, the other end T568A. The link becomes a crossover -- pins 1-2 (transmit) on one end connect to pins 3-6 (receive) on the other.
The symptom: Wire map test shows crossed pairs 1-2 and 3-6. Link will not establish Ethernet connectivity unless auto-MDI/X is enabled on the switch port (which you should never rely on for structured cabling).
The fix: Pick one standard for the entire facility and document it. Most North American commercial sites use T568B. Verify both ends before installing the faceplate.
Mistake 3: Nicked Conductors from Over-Aggressive Stripping
The problem: The cable stripper blade is set too deep and scores the conductor insulation -- or worse, the copper itself. Even a partial nick creates a stress concentration point where copper work-hardens and eventually fractures.
The symptom: Intermittent opens after thermal cycling (day/night temperature swings in ceiling spaces). Link tests fine during commissioning, fails 6 months later. Return loss shows a spike at specific frequencies corresponding to the nick's electrical distance from the termination.
The fix: Adjust stripper blade depth so it cuts through the jacket cleanly but leaves no visible mark on the conductor insulation. After every strip, inspect all 8 conductors for shiny spots or nicks. If in doubt, cut back 50 mm and re-strip.
Mistake 4: Incomplete IDC Seating
The problem: The conductor is partially seated in the IDC slot -- the insulation is displaced but the copper is not fully cold-welded to the IDC blade. This creates a high-resistance contact point (tens of milliohms instead of single-digit milliohms).
The symptom: Cable passes wire map and basic connectivity but fails under PoE load. At 15W (PoE), the voltage drop across the high-resistance contact is negligible. At 60W (PoE++), the I^2R heating at the contact point causes thermal expansion/contraction cycling that eventually creates an open circuit. This is the "works until the cameras are drawing full IR illumination power" fault pattern.
The fix: Use a quality punch-down tool with the correct impact setting. After punch-down, visually verify each conductor sits at the bottom of its slot. Tug each conductor with minimal force to confirm it does not lift out of the slot. If you hear a dull thud instead of a crisp click during punch-down, your blade is dull or the impact spring is worn -- replace the tool.
Mistake 5: Category Mismatch -- Cat5e Jack on Cat6 Cable
The problem: Installing a Cat5e keystone jack on Cat6 cable. The physical form factors are identical (both accept RJ45 plugs), but the internal IDC, PCB layout, and contact geometry are optimized for 100 MHz, not 250 MHz.
The symptom: NEXT and return loss parameters degrade at frequencies above 100 MHz. The connector becomes the weakest link -- the cable has 5 dB of NEXT margin at 250 MHz, but the Cat5e jack only provides 2 dB, so the channel fails at the connector.
The fix: Match jack category to cable category. Cat6 keystone jack on Cat6 cable. Cat6A keystone jack on Cat6A cable. The channel performance is limited by the lowest-rated component.
Rack-It Field Study: Nine Out of Ten Failures Are Termination Problems
Analysis of over 500 failed certification tests found that fewer than 10% were genuine cable defects (manufacturing flaws, damage during installation). The remaining 90%+ traced back to termination: excessive untwist (40%), incomplete punch-down (25%), nicked conductors (15%), split pairs (10%), and category mismatches (10%).
The financial impact: a callback to re-terminate 10 failed jacks on a completed commercial fit-out costs $300-800 in labor and truck roll fees -- far more than the $2-5 a quality keystone jack costs at purchase. Investing in training and quality tools pays for itself within the first week of a structured cabling project.
Keystone Jack vs RJ45 Plug: When to Use Each
8.1 The Unbreakable Rule of Structured Cabling
In-wall horizontal cable runs are ALWAYS terminated to keystone jacks or patch panels. RJ45 plugs are ONLY for factory or field-assembled patch cords. This is not a preference -- it is a reliability requirement grounded in the physical properties of solid vs stranded copper.
| Characteristic | Keystone Jack (IDC) | RJ45 Plug (Crimp) |
|---|---|---|
| Conductor type | Solid copper (23-24 AWG) | Stranded copper (24-26 AWG) preferred; solid possible with matching plug |
| Connection mechanism | IDC cold-welds conductor into gas-tight contact | Crimp pin pierces insulation under mechanical pressure |
| Strain relief | Jack body clamps cable jacket; IDC contacts isolated from pull force | Plug boot and crimp tab share load; repeated plugging stresses contacts |
| Serviceability | Re-terminate without consuming cable length | Must cut off plug; loses 25-30 mm of cable each time |
| Typical use | Permanent link endpoints -- wall outlets, patch panels | Equipment connections -- patch cords, device leads |
| Failure mode | Oxidation at IDC (years), loose punch-down | Broken conductors from flexing (months), loose crimp, bent locking tab |
8.2 Why Solid Copper + RJ45 Plug = Risk
Solid 23 AWG copper is optimized for transmission performance over distance -- it has lower DC resistance per meter than stranded, which means less insertion loss and better PoE efficiency. However, solid copper work-hardens when flexed repeatedly. A solid-core cable terminated into an RJ45 plug that gets plugged/unplugged 50 times in equipment moves will develop micro-fractures at the crimp point. Stranded copper absorbs flexing without work-hardening, which is why patch cords use stranded cable.
The correct architecture: Solid-core Cat6 cable → keystone jack at wall → factory-made stranded patch cord → device. The solid cable never moves; the patch cord absorbs all flexing; the keystone jack provides a serviceable, reliable interface between the two.
8.3 Toolless (Tool-Free) Keystone Jacks: Are They Any Good?
Toolless keystone jacks use a hinged cap that presses conductors into the IDC contacts when you close it -- no punch-down tool required. They are popular in DIY and small-office installations. However:
- Consistency is the concern: The cap applies pressure based on how firmly you close it, not a calibrated spring mechanism. IDC penetration depth can vary between conductors on the same jack, which is why most professional installers prefer traditional 110 punch-down jacks for paid work.
- For home or small office: Toolless jacks produce adequate results for 1G/2.5G operation. If you are running 5G or 10G over Cat6 at short distances, use a punch-down tool.
- For commercial certification work: Use punch-down jacks. The audit trail matters -- if a link fails and the customer asks "did you use proper tools?", you want to answer "yes" with documentation.
Key Questions Answered
What tools do I need to terminate a Cat6 keystone jack?
At minimum: a 110-blade punch-down tool (adjustable impact), an adjustable cable stripper, flush cutters, and a basic cable tester for wire-map verification. For paid professional work, add a cable certifier (Fluke DSX or equivalent) and a label printer. The budget tool set costs approximately $80-100; the professional set runs $300-400 without the certifier. The punch-down tool is the one item where spending under $20 often produces inconsistent results -- a spring-loaded impact mechanism with adjustable HI/LO settings is worth the premium.
T568A or T568B -- which one should I use for Cat6 termination?
For North American commercial installations, use T568B. It is the dominant standard in enterprise, government, and data center environments throughout the United States and Canada. T568A is more common in European commercial settings and some US government legacy installations. The critical rule is that both ends of every cable run must use the same standard. The electrical performance of T568A and T568B is identical -- the difference is purely convention. Verify the project specification before starting work, and never mix standards on the same project.
How much of the twisted pair can I untwist before it causes problems?
The TIA-568 standard specifies a maximum of 13 mm (0.5 inch) of untwisted conductor at the termination point. For Cat6 at 250 MHz, aim for 10 mm (0.4 inch) or less -- every additional millimeter of untwist incrementally degrades NEXT (near-end crosstalk) performance, especially at higher frequencies. This is the single most common cause of Cat6 certification failures. If you need to untwist more than 13 mm to reach the IDC slots, you stripped too little jacket -- re-strip with 10-15 mm more jacket removed and re-seat the conductors.
Can I use the same punch-down tool for Cat5e, Cat6, and Cat6A?
Yes. A quality 110-blade punch-down tool with adjustable HI/LO impact works for all three categories. The tool's impact mechanism drives the conductor into the IDC slot with consistent force regardless of cable category -- the category-specific engineering is in the keystone jack's IDC design, not the punch-down tool. Use HI impact for 23-24 AWG solid copper (Cat6, Cat6A) and LO impact for thinner conductors (26 AWG stranded or Cat5e solid in older installations). Replace the 110 blade after approximately 500-800 punch-downs when you notice rough cuts or inconsistent trim quality.
Why does my cable tester show all 8 lights but my network connection fails?
This is the classic symptom of a split pair -- where both wires of a pair (e.g., white/orange and orange) were terminated to the correct pin numbers but using pins that belong to different physical pairs. A basic continuity tester only checks that pin 1 connects to pin 1, pin 2 to pin 2, etc. It does not verify that pin 1 and pin 2 are a single twisted pair. The split pair creates massive crosstalk because the signal currents on what should be a balanced pair now travel through wires with different twist rates and different physical coupling to other pairs. A wire-map tester passes; a certification tester fails; a switch link will not come up or negotiates at severely reduced speed.
Should I use shielded (STP) or unshielded (UTP) Cat6 keystone jacks?
For most office and commercial environments, unshielded Cat6 keystone jacks are sufficient. Use shielded jacks only when: (a) you are installing shielded Cat6 or Cat6A cable (F/UTP or S/FTP) and need shield continuity end-to-end; (b) the environment has known EMI sources (variable-frequency drives, large motors, medical imaging equipment, radio transmitters); or (c) the project specification explicitly requires a shielded system. Shielded systems require shielded cable, shielded jacks, shielded patch panels, and proper grounding at the telecommunications room -- a single unshielded component in the chain breaks shield continuity. Do not mix shielded and unshielded components in the same permanent link.
Can I re-terminate a Cat6 keystone jack if I make a mistake?
Yes, within limits. If you discover a wiring error during visual inspection (before closing the jack), re-punch the affected conductors. If the jack is already closed and installed: remove it from the wall plate, open the dust cover, and inspect. The IDC contacts can typically withstand 2-3 re-punch cycles before the contact blades lose tension. If the conductors were cut too short to reach the IDC slots after re-termination, you will need to pull a small amount of service loop from the wall box and re-strip. Plan for 10-15 cm (4-6 inches) of service loop inside every wall box specifically for this scenario. If the IDC contacts show visible wear or deformation, replace the jack -- a $3 jack is cheaper than a $150 service call.
What is the difference between 110-style and Krone-style punch-down?
Both are IDC (Insulation Displacement Contact) termination methods, but they use different blade geometries and are not interchangeable. 110-style is the North American standard for data networking -- it uses a V-shaped IDC slot that the conductor is pressed into with a 110 blade. Krone-style (also called LSA-PLUS) is common in European telecom applications -- it uses a 45-degree offset IDC contact and a Krone-specific punch-down tool. Most modern Cat6 keystone jacks sold in North America use 110-style IDC contacts. Do not use a Krone tool on a 110 jack or vice versa -- the blade geometry mismatch produces incomplete IDC seating. Verify which type your keystone jack requires before buying tools or starting work.
Related Articles
- Cat6 Patch Cable: Everything You Need to Know -- Complete guide to Cat6 specifications, performance tiers, and selection criteria for data center and enterprise networks
- Component vs Channel vs Permanent Link Testing: Specs, Limits & Certification Guide -- Understanding the three testing methodologies and how termination quality affects each measurement boundary
- Fiber Optic Installation Mistakes: Bend Radius, Splicing & $15K/Hr Costs -- The same principles of careful termination apply to fiber; learn the parallel world of optical link mistakes and their financial impact
- 288-Fiber High-Density Solutions: How Data Center Cabling Meets AI-Era Bandwidth Demands -- When copper meets its limits, fiber takes over; explore high-density cabling architectures for next-generation data centers

AMPCOM Technical Team
Industry experts with 17+ years in enterprise network infrastructure
Planning a large-scale structured cabling deployment?
Our team offers free consultation, bill-of-materials review, and customized cabling solutions for commercial and enterprise installations.
Get Free Consultation

