
Cable Tracing: How to Find and Label Every Cable
Published:Executive Summary: Every network technician has stared into a rack full of unlabeled cables and felt the same dread. A simple port reassignment becomes a 45-minute guessing game. A fiber cut takes hours to isolate instead of minutes. A camera drop turns into an archaeology expedition. The global cable identification market reached $1.45 billion in 2025 and is projected to hit $2.78 billion by 2034 at 7.5 percent CAGR, driven by the same pain point every facility shares: you cannot manage what you cannot identify.
This field guide covers the complete workflow: TIA-606-C labeling standards, cable tracing tools from tone generators to Fluke LinkIQ, label materials that survive 25 years, documentation systems that convert one-time effort into a permanent asset, and the safe procedure for tracing unknown cables without pulling something critical.
Quick Navigation
- 1 The Hidden Cost of Unlabeled Cables
- 2 TIA-606: From A to E, the Labeling Standard Evolution
- 3 Color Coding: Visual Identification by Function
- 4 Cable Tracing Tools: Tone Generator to Digital Probe
- 5 Label Types and Materials: Choosing What Lasts
- 6 Labeling Best Practices: Before, During, and After Installation
- 7 Building a Cable Schedule and Documentation System
- 8 Tracing Unknown Cables: The Safe Procedure
- 9 Testing and Verification: Proving Your Work
- 10 Common Mistakes and the ROI of Proper Labeling
- 11 Key Questions

Unlabeled cables turn a five-minute port change into an hour of guesswork and risk
1. The Hidden Cost of Unlabeled Cables
Unlabeled cables are not a cosmetic problem. They are an operational, financial, and safety liability that compounds with every move, add, and change. When a technician cannot identify which cable belongs to which circuit, every routine task becomes a high-stakes operation. The costs manifest in four ways:
- Extended downtime: tracing an unlabeled cable through a bundle of 200 takes 30 to 90 minutes. A labeled cable takes under 60 seconds. That 30x difference is the gap between a brief service blip and a business-impacting outage.
- Misidentification risk: "unknown" does not mean "unused." That mystery cable could be carrying a security camera feed, a door access controller, a fire alarm circuit, a phone line, or a carrier demarcation. Pulling it blind can disable critical building systems.
- Labor waste: every cable archaeology session burns technician hours that should be spent on productive work. Teams that maintain unlabeled plants routinely spend 20 to 30 percent of their time tracing cables instead of improving the network.
- Warranty void: manufacturer 25-year performance warranties require TIA-606-compliant labeling and documentation. An unlabeled plant has no warranty coverage, period.
The market is responding. According to Strategic Market Research, the global cable tags market was valued at $1.50 billion in 2025 and is projected to reach $2.20 billion by 2032 at a 5.6 percent CAGR. Global Info Research reports a slightly broader cable identification products market of $1.841 billion in 2025, growing to $3.179 billion by 2032 at 8.3 percent CAGR. Brady Corporation, a leading label manufacturer, reported wire-identification sales of $247.9 million in fiscal 2025, up from $228.4 million in 2024, supported by $79.9 million in R&D investment focused on printers, materials, and software systems. For a practical framework on keeping racks organized beyond labeling, see our guide to cable management best practices in server rooms.
2. TIA-606: From A to E, the Labeling Standard Evolution
The Telecommunications Industry Association (TIA) has refined its administration standard over two decades, each version expanding scope and granularity to match the growing complexity of network infrastructure.
| Version | Year | Key Additions |
|---|---|---|
| TIA-606-A | 2002 | First voluntary standard. Defined minimum label content and cable-to-location mapping |
| TIA-606-B | 2012 | Expanded to all facility types and sizes: small offices to enterprise campuses and data centers. Added finer-grained location identification |
| TIA-606-C | 2017 | Current recommended standard. Refined labeling requirements, color coding, and documentation practices |
| ANSI/TIA-606-D | Current | Covers automated infrastructure management (AIM) systems and wider building types. Foundation for structured cable identification |
| TIA-606-E | Under review (2026) | Next update in development, reflecting continued importance of structured cable identification |
Four reasons drive universal adoption of TIA-606-C in professional installations:
- Simplified workflow: the standard eliminates guesswork by defining exactly what information belongs on every label and how identifiers should be structured.
- Efficiency: pre-defined schemas reduce label creation time and streamline the entire installation and documentation process.
- Warranty compliance: cable warranties from manufacturers like CommScope, Panduit, and Legrand require labeling and documentation submitted directly to the manufacturer as proof of proper system installation.
- Professional standard: clear, durable, machine-printed labels are the visible signature of an experienced installation team and a maintainable infrastructure.
4BK01-55:50/DC.C03-14:04. This encodes: 4=4th floor, BK=brokerage department, 01=first cabinet, 55=patch panel 55 rack units from bottom, :50=port 50, then the far end: DC=data center, C03=row C cabinet 3, -14=panel 14U, :04=port 4. The other end reads the same in reverse order. For a deeper treatment of how these identifiers integrate with patch panel design, see our patch panel port numbering and labeling system guide.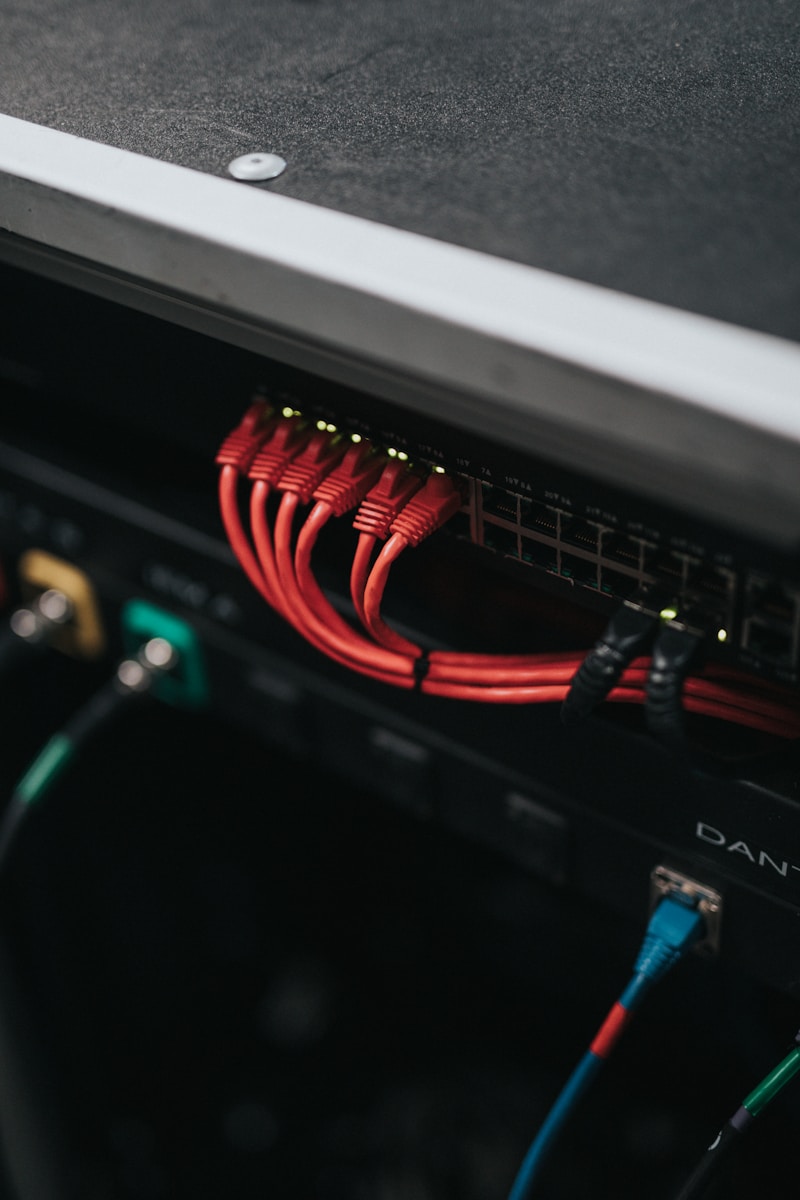
A TIA-606-C compliant patch panel: machine-printed identifiers on every port, color coding by function, digital records to match
3. Color Coding: Visual Identification by Function
TIA-606-B introduced an optional but universally adopted color coding system that lets a technician identify a cable's function at a glance, before reading a single label. Color coding does not replace labeling; it supplements it with an immediate visual cue that speeds troubleshooting and prevents cross-connection errors in dense environments.
| Color | Pantone | Function | Typical Use |
|---|---|---|---|
| Orange | 150 C | Demarcation point | Central office connection, carrier handoff |
| Green | 353 C | Network connection | Customer side of CO demarcation, core network |
| Purple | 264 C | Common equipment | PBX, LAN, mainframe, shared systems |
| White | — | First-level backbone | MC to IC connections within a building |
| Gray | 422 C | Second-level backbone | IC to HC connections, MDF to IDF links |
| Brown | 465 C | Interbuilding backbone | Campus cabling between buildings |
| Blue | 291 C | Horizontal cabling | TR to workstation outlet termination |
| Yellow | 101 C | Auxiliary / security | Alarms, security systems, PoE circuits |
| Red | — | Key telephone | Key telephone system terminations |
Color coding is most effective when combined with a written legend posted at the entrance to every data center and telecommunications room. Variations between contractors working in the same facility create confusion that lasts the life of the installation, so a single-manufacturer, single-schema approach is strongly recommended. For a comprehensive treatment of color coding systems and how they integrate with cable management, see our guide to cable color coding and labeling best practices.
4. Cable Tracing Tools: Tone Generator to Digital Probe
No single tool handles every tracing scenario. Professional technicians carry a kit of complementary instruments, each solving a different identification problem. The evolution from analog tone generators to digital multifunction testers has dramatically reduced tracing time while adding diagnostic depth that was previously unavailable in handheld form factors.
4.1 Tone Generator and Probe
The classic tone-and-probe kit sends an analog audio signal down a cable that a handheld probe can detect through insulation and conduit. It is the fastest tool for locating a specific cable in a large bundle, but it cannot tell you whether that cable actually works. Analog toning is susceptible to noise and interference in environments with heavy electrical equipment. For deeper coverage of how cable tracers work in complex environments, see our guide on cable tracer precision and anti-interference capability.
4.2 Fluke CableIQ (Discontinued) and LinkIQ (Current)
The Fluke CableIQ was the industry-standard qualification tester for years, combining wiremap diagnostics, bandwidth qualification up to 1Gbps, IntelliTone digital toning, and network discovery in one handheld unit. It reduced problem escalation by up to 30 percent by letting frontline technicians determine whether issues originated in cabling or connected equipment before involving senior engineers.
Its successor, the Fluke LinkIQ Cable + Network Tester, expands capabilities for modern PoE-driven networks. Key improvements include support for Cat5e through Cat8, switch identification via LLDP/CDP protocols displaying switch name, port, VLAN, and advertised speeds, PoE load testing up to 90W (802.3bt Class 8), a color touchscreen, and cloud-based reporting through LinkWare Live. For guidance on interpreting test results from these instruments, see our article on how to read Fluke test reports for procurement.

A modern cable tester combines tracing, wiremap, PoE verification, and switch identification in one tool
4.3 Switch-Port Link Lights and MAC Address Tables
When switch access is available, two software-based methods complement physical tracing tools. The link light blink technique uses the switch CLI to flash a specific port's LED, letting a technician confirm which cable connects to which port from the rack side. The MAC address table lookup reveals which port a known device MAC is learned on, establishing the port-to-device mapping without any physical probing. These methods are fast but require switch credentials and network access.
4.4 Visual Path Tracing
In buildings with open cable trays, ladder rack, or accessible ceilings, following the cable by eye from one end to the other is still the most reliable method for short runs. It requires no tools but depends entirely on physical accessibility and cable routing discipline. For tracing technologies that go beyond traditional methods, read our coverage of new cable tracing technologies and sensor applications.
For a complete walkthrough of cable tracing methodology using professional tools, see our comprehensive guide on how to trace ethernet cables with a cable tracer and our mastering cable tracer: beginner to expert guide.
5. Label Types and Materials: Choosing What Lasts
A label that fades, peels, or becomes illegible after two years is worse than no label, because it creates false confidence. Material selection is driven by the installation environment, expected service life, and the printing system used. The cable tags market reflects this diversity: plastic accounts for 52 percent of material revenue (PVC 31.2 percent, nylon 20.8 percent), metal for 28 percent (stainless steel 18.2 percent, aluminum 9.8 percent), and heat-shrink sleeves represent the fastest-growing segment.
| Label Type | Material | Best Environment | Service Life |
|---|---|---|---|
| Self-laminating wrap | Polyester with clear overwrap | Indoor data centers, telecom rooms, office | 15-25 years |
| Flag label | Polyester, adhesive-backed | Small-diameter fiber and copper cables | 10-15 years |
| Heat-shrink tubing | Cross-linked polyolefin | Industrial, outdoor, harsh environments | 20-25 years |
| Stainless steel tag | 316 SS, laser-etched | Outdoor, marine, chemical plants | 25+ years |
| Nylon cable tag | UV-stable nylon | Outdoor, UV-exposed installations | 15-20 years |
For industrial applications with specific environmental challenges, our article on cable tracer applications in specific industries covers material selection for harsh environments. And for environments where tracing accuracy under interference is critical, the cable tracer essentials guide provides the technical foundation.
6. Labeling Best Practices: Before, During, and After Installation
Following TIA-606-C is not difficult, but it requires discipline at three phases of the cable lifecycle. Each phase has specific rules that prevent the most common labeling failures.
6.1 Before Installation: Label Design
- Assign a unique cable ID during the design phase, not during installation. The cable schedule should include required cable type and installation location before any cable is pulled.
- Use abbreviations consistently. "C" for cable, "A" and "B" for department or floor zones. Never mix abbreviation schemes within one project.
- Plan for expansion. The numbering system must accommodate future growth without renumbering existing cables.
- Match drawings to labels. The naming and numbering system must reflect the same information as the project drawings, with no discrepancies.
6.2 During Installation: Label Application
- Print, never handwrite. Machine-printed labels are legible, consistent, and durable. Use a 300 DPI or higher printer for labels carrying 11-12 characters per line on a 2-inch label.
- Label before pulling. Apply permanent labels when cables are cut to length, before termination. This lets every worker identify the correct cable bundle at the panel and at the work area.
- Place within 4-5 inches of the connector. This ensures troubleshooting personnel can find the label without pulling or straining the cable.
- Wrap, do not stick longitudinally. Even self-laminating labels applied along the cable axis can crack and detach when the cable bends. Wrap-around labels conform to the cable and survive flexing.
- Label both ends. Every cable must carry a label at both terminations, and the faceplate label at the work area end must match the panel label at the TR end.

Labels applied before termination, within 4-5 inches of the connector, printed at 300 DPI minimum
6.3 After Installation: Verification and Documentation
- Verify every label against the cable schedule. A label that does not match the record is as bad as no label.
- Photograph every rack. Front and back, at handover and after major MAC batches. Photos provide a visual baseline for future change tracking.
- Update the database immediately after every MAC. The cable schedule, patch panel map, and port-to-VLAN database must reflect current reality, not last quarter's reality.
For the broader context of how labeling integrates with total cable management discipline, see our guide to data center cable management best practices and our framework for patch panel cable management.
7. Building a Cable Schedule and Documentation System
Labels are the visible layer; documentation is the system that makes them useful. Without a matching digital record, even perfect labels degrade into disconnected data points. The TIA-606-C documentation package has four required deliverables:
| Deliverable | Content | Purpose |
|---|---|---|
| Cable Schedule | Cable ID, source, destination, cable type, length, connector type, wiring scheme, service | Master lookup table for every cable in the facility |
| Patch Panel Map | Panel-to-port-to-outlet mapping with physical location | Visual reference for patching and troubleshooting |
| Photographs | Rack front and back, TR overviews, ISP demarcation points | Baseline visual record for change tracking |
| Notes on Unknowns | Untraceable cables, pending items, special-use circuits | Risk register for items requiring further investigation |
The cable schedule is the single source of truth. It can live in a spreadsheet for small installations, a DCIM (Data Center Infrastructure Management) platform for large data centers, or a purpose-built cable management software package. The key requirements are import/export capability, label selection and text management, built-in sequence generators, and barcode or RFID tracking support for large-scale operations. For organizations evaluating maintainable patch panel systems that integrate with documentation, see our analysis of enterprise network patch panels designed for traceability.
8. Tracing Unknown Cables: The Safe Procedure
Every established network has them: cables with no label, no documentation, and no obvious purpose. The temptation is to pull them and clean up. That temptation is wrong. An unlabeled cable could be carrying a fire alarm circuit, a security camera feed, a door access controller, a carrier demarcation, or a phone line serving a critical executive. Removing it blind can disable building systems, trigger compliance violations, or sever a revenue-generating service.
Safe Tracing Procedure
- Step 1: Document before touching. Photograph the rack front and back. Record switch names, port counts, any existing labels (even bad ones provide clues). Note ISP equipment and carrier handoff points.
- Step 2: Use multiple tracing methods. No single method works in every building. Combine tone and probe, cable tester wiremap, switch-port link lights, MAC address table, endpoint checks, and visual path tracing.
- Step 3: Confirm at both ends. A trace is not complete until you have verified the cable identity at both terminations and confirmed the service it carries.
- Step 4: Label and document immediately. Once identified, apply a TIA-606-C compliant label at both ends and update the cable schedule before moving on.
- Step 5: Flag unknowns for approval. If a cable cannot be traced, flag it in the documentation as unknown. Removal should happen only after tracing, written approval, and a plan for validating affected systems.
For environments where cable tracing is mission-critical, such as data centers and industrial control systems, the role of cable tracers in critical environments guide covers specialized techniques and safety considerations. For day-to-day maintenance workflows, our article on how cable tracers improve your cable management and maintenance provides the operational framework.
9. Testing and Verification: Proving Your Work
Tracing and labeling are only complete when verified. A cable that has been identified, labeled, and documented must still be tested to confirm it functions correctly and meets the performance standard for its category. This is where cable tracing converges with cable certification.
The Fluke LinkIQ handles the verification loop for most office and campus environments: wiremap confirms the pin-to-pin connection is correct, length measurement verifies the run is within the 100-meter channel limit, distance-to-fault pinpoints any break location, and PoE load testing confirms power delivery to the endpoint. For full Cat6a or Cat8 certification to TIA standards, a Level 2G/VI certifier like the Fluke DSX-5000 or DSX-8000 is required. The distinction between qualification (LinkIQ) and certification (DSX) matters for acceptance: qualification tells you the cable works, certification proves it meets the standard. See our comparison of component vs channel testing and the permanent link vs channel testing guide for the full picture.
For network troubleshooting scenarios where tracing meets diagnostics, our network cable troubleshooting guide provides the systematic approach to isolating faults. And for understanding the regulatory framework behind cable tracer standardization, our study on cable tracer standardization covers the compliance landscape.
10. Common Mistakes and the ROI of Proper Labeling
After thousands of installations and audits, the same labeling failures recur with predictable consequences. Each is cheap to prevent and expensive to remediate:
| Mistake | Consequence | Prevention |
|---|---|---|
| Handwritten labels | Illegible within 2-3 years; inconsistent format | Machine-printed labels at 300 DPI minimum |
| Labels applied after termination | Wrong cable labeled; labels placed too far from connector | Label at cut-to-length stage, before pulling |
| Label only one end | Cannot trace from the other side; documentation incomplete | Both ends, every cable, no exceptions |
| Longitudinal label application | Label cracks and detaches at cable bends | Wrap-around application conforming to cable diameter |
| No cable schedule database | Labels exist but cannot be looked up; tracing still slow | Digital schedule updated with every MAC |
| Mixed abbreviation schemes | No two technicians read the same identifier the same way | Single schema agreed before first cable is pulled |
| Removing unknown cables without tracing | Disconnected critical systems; compliance violations | Trace, confirm, approve, then remove |
The ROI calculation is straightforward. A label printer costs $300-$800. A roll of self-laminating wraps costs $30-$60. The labor to label 100 cables is roughly 4 hours. Total investment for a 100-cabinet data center: under $2,000. The cost of a single cable-tracing incident that takes 90 minutes instead of 60 seconds, at $150/hour loaded technician cost, is $225 per event. An unlabeled plant generates dozens of these events per year. The payback period for a labeling program is measured in weeks, not years. For the broader cable management investment case, read our analysis of network cable total cost of ownership and the installation and maintenance best practices that keep that investment performing for 25 years.
Key Questions
Q1: What is cable tracing?
Cable tracing is the process of physically locating and identifying a specific cable within a bundle, conduit, or rack using tools such as tone generators, cable testers, switch-port link lights, and MAC address table lookups. The goal is to confirm which cable connects to which port, device, or service before making any move, add, or change.
Q2: What is the TIA-606-C standard for cable labeling?
TIA-606-C defines how cables, connecting hardware, pathways, and spaces should be identified, labeled, and documented. It specifies unique identifiers, requires machine-printed labels at both ends, and recommends color coding by function. The standard ensures any technician can locate, trace, and verify any connection in the facility.
Q3: How do you trace an unlabeled cable?
Start by photographing the rack, recording existing labels, and noting switch names. Then use a tone generator and probe to trace the cable's path, cross-reference with switch-port link lights and MAC tables, and confirm at both endpoints. Never remove an unknown cable until you have traced it and received written approval.
Q4: What should a cable label include?
Per TIA-606-C, a label should include a unique cable identifier encoding source and destination locations: building, floor, room, rack, patch panel, and port number. Labels must be machine-printed, applied at both ends within 4-5 inches of the connector, and matched to a digital record updated with every change.
Q5: What is the difference between a tone generator and a cable tester?
A tone generator sends an audio signal for physical cable tracing. A cable tester goes further: it verifies wiremap, measures length, detects faults, and some models qualify bandwidth and test PoE. Modern tools like the Fluke LinkIQ combine both functions plus switch identification and PoE load testing.
Q6: What type of label material should I use for network cables?
Self-laminating polyester wraps are standard for indoor data and telecom cabling. Heat-shrink tubing is preferred for harsh industrial environments. For outdoor or underground installations, use UV-stable nylon or stainless steel tags. Always choose materials rated for the environment and ensure labels remain legible for the cable system's life.
Q7: Is cable labeling required by code or warranty?
TIA-606-C labeling is not legally mandated but is required by manufacturer warranty programs. Most 25-year performance warranties are void unless cables are labeled to TIA-606 standards, installed by registered installers, and documented with certification reports. Labeling is also a prerequisite for data center tier certifications.
Q8: How often should cable labels and documentation be audited?
Audit at least annually, and after every batch of moves, adds, or changes. Quarterly visual inspections of high-churn areas like data center patch frames catch label degradation and undocumented patching. Update the cable schedule database immediately after every change; a label that does not match the record is as bad as no label.
About AMPCOM Network Cabling Solutions
AMPCOM supplies a comprehensive range of copper and fiber network infrastructure products engineered for campus, data center, and enterprise deployments:
- Network Cables: Cat5e through Cat8 bulk copper cables for structured campus wiring — available at AMPCOM network cable collection
- Patch Cables: Cat6 and Cat6a shielded and unshielded patch cords in precise lengths — browse AMPCOM patch cable collection
- Patch Panels: Cat6 and Cat6a fixed-port, tool-less keystone, and fiber distribution panels — visit AMPCOM patch panel collection
- Fiber Patch Cables: OS2 singlemode and OM3/OM4/OM5 multimode with LC, SC, and MPO connectors — explore our complete fiber patch cable collection
-
Wiring Management: Server racks, PDUs, cable managers, and accessories for complete campus infrastructure — see AMPCOM wiring management solutions
Related Articles
- Cable Color Coding and Labeling Best Practices — Companion guide covering the full TIA-606 color coding system, label schema design, and how to implement consistent identification across multi-vendor environments
- How to Trace Ethernet Cables with a Cable Tracer — Step-by-step field guide to using tone generators and probes, including safety protocols and techniques for tracing cables in live network environments
- Mastering Cable Tracer: Beginner to Expert Guide — Progressive skill-building guide covering analog and digital toning, wiremap diagnostics, advanced tracing techniques, and troubleshooting complex cable identification scenarios
- Patch Panel Cable Management: Complete Guide — Companion guide covering panel selection, horizontal and vertical cable managers, patch cord discipline, and the rack-level practices that keep labeled cables organized

AMPCOM Technical Team
Industry experts with 17+ years in cable management, tracing tools, and TIA-606 administration standards
Need help with cable tracing and labeling?
Our technical team provides free consultation on TIA-606-C labeling compliance, cable tracer tool selection, and complete cable management solutions for enterprise and data center environments.
Get Free Expert Consultation

